Shop By Category

Stained Glass Projects For Beginners

Stained Glass Projects For Beginners

$19.95 USD
Item# 6299   In Stock

Product Features

  • Learn, create and be inspired with Stained Glass Projects for Beginners
  • Includes 31 projects with full color photos
  • 176 pages - Softcover

Product Description

From Lynette Wrigley and IMM Lifestyle Books comes Stained Glass Projects for Beginners: 31 Projects to Make in a Weekend. This 176-page softcover book features step by step instructions and patterns. With full-color photos, this book will serve as a reference and inspiration source for anyone interested in art glass.

Customers Who Viewed This Item Also Viewed

item: 8798
item: 443100
Prairie Bevel Cluster
$44.95 $17.93
61% off
item: 5429
Complete Beetle Bits Starter Kit
$229.95 $199.95
$30.00 off
item: 6951
Heart Suncatchers Project Kit
$47.95 $33.95
30% off
item: SB014
Holland Bevel Cluster
$26.95 $9.00
67% off
item: 6384

Customer Reviews

2 out of 5 stars
5 star  
  0
4 star
  0
3 star
  0
2 star
  1
1 star
  0
See all customer reviews
Write a customer review

Product Images from Customers

Be the first to share product images with other customers
2 out of 5 stars
  •  
By on
Pros :
Cons :
Was this review helpful to you?  

See all customer reviews
Related Content
Jun 07, 2010
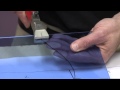
1. Make sure that your pieces are clean and dry. Cut a piece of clear contact paper, remove the backing and lay it sticky-side-up over the pattern. 2. This is a perfect way to hold cut glass, globs, jewels, or marbles in place for tack soldering. As you can see in the photo, you can even move the sheet around and, if you are careful, you shouldn’t disturb the glass at all. 3. Tack solder the pieces to each other as you normally would. Then, remove the contact paper and finish soldering the front before turning the project over and soldering the back. Reprinted with permission from Stained Glass News. All rights reserved.
May 05, 2010
I have some questions about Lead-Free Solder. Does it tarnish over time? Can you use patina on it? Does it flow like regular solder? Is it better than regular solder? We are sure that you arent the only one with these questions. Lets start with the question of whether or not its better than regular solder. Since the harm from lead is caused by ingestion, any project that will come in contact with food or food containers should be made with lead-free solder. In addition, anything that is handled, like jewelry or kaleidoscopes, should be made with lead-free solder. Hands have a terrible habit of making it into the mouth before they get washed. So, yes it is better than regular solder in these situations. As far as working with solder, you should be diligent about cleaning your hands after touching any solder. Dont eat, drink, smoke, or do anything
Aug 09, 2010
I want to make some copper foil and lead projects for use outside. How do I protect them from the elements? If you construct your project using the lead technique, there isnt anything else you need to do. The cementing process weatherproofs the project. If you use the copper foil technique, you will want to make sure that there is something to prevent the copper foil from pulling away from the outer edges of the project when it gets wet. This can be accomplished by using a rigid metal channel (zinc, copper or brass) or by soldering a reinforcing wire around the perimeter of the piece. Another thing you should consider is using mosaic techniques. Either the direct or indirect methods are great for outdoor projects. Your supplier will have information on these techniques if you are unfamiliar with them. Whatever technique you choose to employ, it is best to