Shop By Category
Take 20% OFF Your Order* - Ends Wednesday

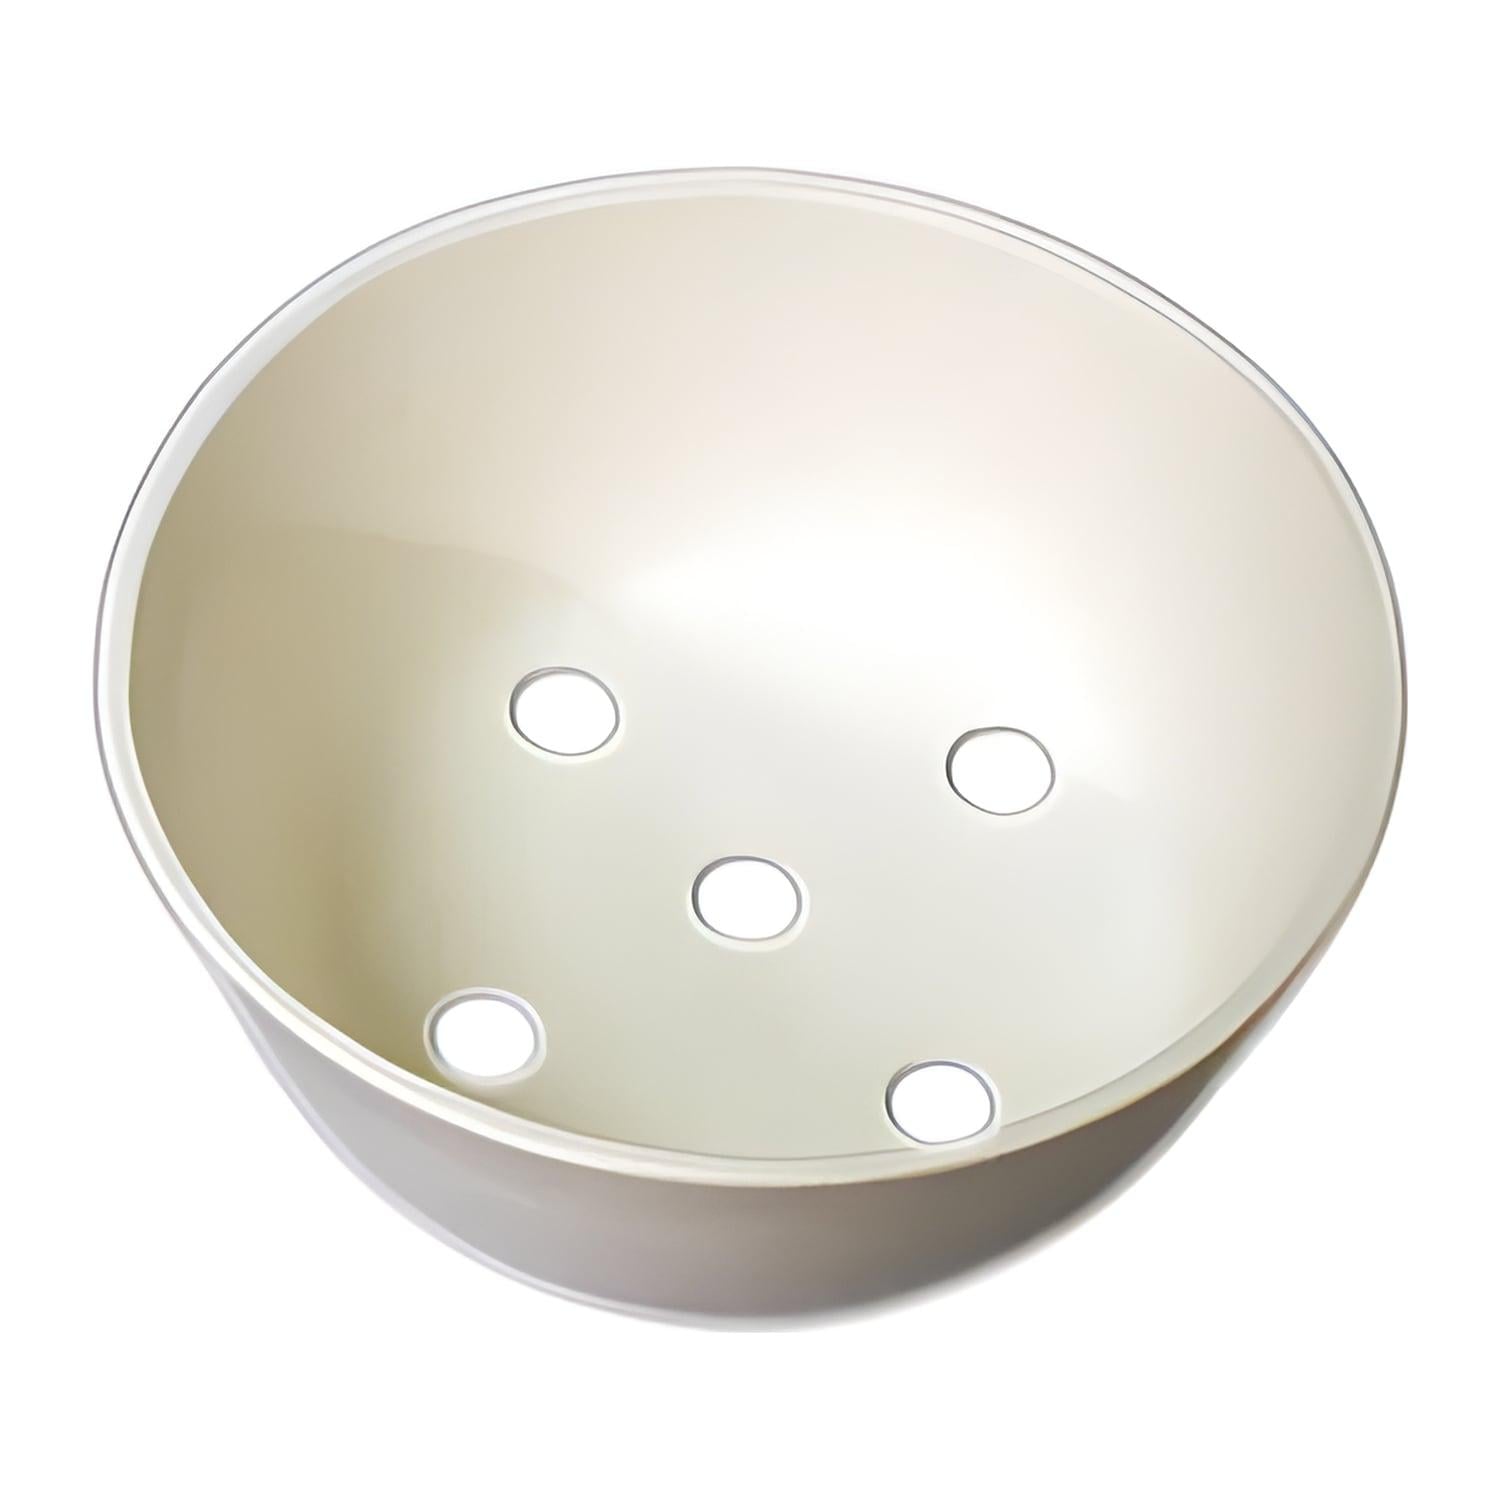
Multi Hole Pot Melt Mold

Multi Hole Pot Melt Mold by Creative Paradise
$19.95 USD
Item# 24692
Item# 24692  
Currently Out of Stock

Product Features

  • Stack your favorite colors of fusible glass scrap into exclusive pot melt molds to create dramatic one-of-a-kind marbled glass
  • Multi hole pot melt creates a unique design with separate flows of color and pattern
  • Ceramic mold measures 6-1/2" wide by 2-1/2" deep

Product Description

Delphi Exclusive An Excellent Way to Use Up Scrap Glass
Stack your fusible scrap glass into this exclusive pot melt mold to create dramatic one-of-a-kind marbled glass. Place the mold on top of kiln posts and dams inside the kiln. Once hot, the glass will flow out of this mold and onto a kiln shelf that you place below. Durable ceramic molds measures 6-1/2" wide by 2-1/2" deep. Includes Delphi Tips and instruction sheet. To learn more about setting up your Pot Melt Mold, watch the video "How to Set Up a Pot Melt", or find other valuable fusing tips on Art Glass TV. A Delphi Exclusive.
 

Step-By-Step: How to Make a Pot Melt

 
step 1
Step 1. On a level, kiln washed shelf, elevate the Pot Melt Mold on a combination of kiln posts and dams, making sure the hole(s) in the mold are unobstructed.
 
step 2
Step 2. Fill your mold with compatible fusible glass.
 
step 3
Step 3: Fuse, making sure that your glass reaches the maximum temperature to enable the molten glass to flow out of the mold leaving behind as little glass as possible helping to prevent the mold from thermal shocking.
 
step 4
Step 4. Display your one-of-a-kind pot melt creation, or continue creating by slumping, cold-working, or cutting up your pot melt to use in other fused projects.
 
 
For complete instructions and tips view the User Manual shown with the additional images.

Tips on Using Pot Melt Molds
  • Make sure the kiln shelf you use is pre-washed, completely dry and level in your kiln.
  • Experiment using different slumping molds instead of kiln shelves to melt glass onto. The glass will take the shape and texture of the mold you choose.
  • There is no way to get all of the glass out of the mold. However if you layer clear in the bottom first with your colors on top you'll have less mixing of colors when you do a new project.
  • Not intended for use in table top kilns.

Projects created by Delphi artist Val Oswalt-De Waard. Val created a Drop on Drape pot melt project using the 8-3/4" Plate Ring (#80720) and 9" Foot Drape (#807819).

Customer Reviews

5 out of 5 stars
5 star  
  3
4 star
  0
3 star
  0
2 star
  0
1 star
  0
See all 3 customer reviews
Write a customer review

Product Images from Customers

Be the first to share product images with other customers
5 out of 5 stars
  •   Love This One!
By on
Pros : The multi holes give my work a variety of color that cannot be matched by any other method. The five holes allow for various colors of glasses or even textures to swirl and blend. The result is unbelieveable!
Cons : None that I can speak of.
Was this review helpful to you?  
2 of 4 people found this review helpful
5 out of 5 stars
  •   multi hole pot melt mold
By on
Pros : I absolutely love this bowl. The results of the melt are definitely one of kind. I got 5 different design elements out of one melt. There are so many things that I can create out of this melt. I can cut it for unique jewelry, wind chimes, etc, or just leave as is for a high impact piece. It's fun to have a total surprise of what your end result will look like. I bought the whole set.
Cons : I had read that it had cracked after the first use. So, I gave it a slow cool down ramp, no cracks. I still have to figure out how to cut the melting glass while it's still hot to avoid the glass cooling into icicles. It's way too hot to get in there and snip the dripping glass. So, after it cools I have to break the so-called icicles from the pot holes that are now attached to my glass. I then grind these spots where I cut the glass and then fire polish it. I will figure out a way to get rid of the icicle problem.
Other Thoughts : Totally worth it. If it cracks, I will buy another one. I melt it right onto thinfire paper so I don't have to worry about my kiln shelf. I definitely encourage a slow ramp to cool it down.
Was this review helpful to you?  
1 of 2 people found this review helpful
5 out of 5 stars
  •   What fun!
By on
Pros : Perfect use for scrap and bad ideas. Creates areas of color which add interest. EASY to do!
Cons : There are 5 distinct areas in the finished piece, but I think they're interesting.
Other Thoughts : Use a lot of white or clear scrap - darker colors want to dominate. You absolutely must have kiln posts (4) and glass dams (4). I use a 1" kiln post and 4 8" dams to support the pot and fit my kiln.
Was this review helpful to you?  

See all 3 customer reviews
Related Content
My commuting jacket is drying over a kitchen chair, and the cat has come down off the workbench to sniff the sleeve with deep suspicion. Fair enough. Theres a stripe of brown grit up the back, the kind wet roads and mashed leaves throw up all autumn.That grit ends up on brakes too. So heres a short pre-winter check for Defiant riders. Im working from general technique and the JupiterBike product listings, not from my own bike.Why autumn chews through brake padsQuick jargon check. On a disc brake, a metal disc called the rotor is fixed to the wheel hub. Two pads squeeze it to slow you down. They sit in a caliper, the clamp that straddles the rotor.Wet roads carry grit and leaf mush onto the rotor. When you brake, that grit gets trapped between pad and rotor and works like sandpaper, so the same commute wears pads faster